Showing posts with label gluten free. Show all posts

Wednesday, September 2, 2015

Einkorn Bread


I cannot wait to try this bread!!!!

Einkorn bread

It is made from 100% einkorn flour, an ancient wheat. Modern, as well as most heritage, wheats are hybridized, meaning they are a blend of different wheats and grasses. Hybridization happens in order to make a change to the wheat. Modern wheat has higher yields at harvest and more gluten protein, which makes for a fluffier bread. Hybridization may be a cause of gluten intolerance that many people suffer today. The Healthy Home Economist goes into some detail here. For myself, I believe that old fashioned methods may be the answer to my own food issues. I am allergic to pasteurized dairy and am gluten sensitive. I also have issues with processed gluten free products and processed corn. I have been trying to get back to basics.

I ordered einkorn flour to test my tolerance to it. I've also begun fermenting a new sourdough starter and will use this einkorn flour to make sourdough bread! But, for now, I made this yeast bread using a recipe on the bag of my Jovial brand flour.

Einkorn bread

Seriously, how delicious does this bread look??

Einkorn bread

Einkorn bread

Einkorn bread

Einkorn bread

Einkorn bread

At about $4 per pound, this flour seems a bit spendy but it is actually reasonable when you think about how much a regular whole wheat loaf costs at the grocery store. It makes it A LOT easier for me to justify anyway. I used half of my bag on this one loaf, so dollar for dollar compared to grocery store bread, this seems close to equal. 

Here is the recipe:

Two-Hour Sandwich Bread (Jovial Brand Flour)

1 1/4 cups warm water
1 1/2 teaspoon dry active yeast
2 tablespoons melted butter or oil
1 tablespoon sugar or honey
3 3/4 cups einkorn flour
1 1/4 teaspoons sea salt

In a large bowl, combine water, yeast, oil or butter, and sugar or honey. Stir until creamy. Add the flour on top of the yeast mixture. Sprinkle the salt on top. Mix with a spatula until flour is absorbed and you have a wet, sticky dough. Cover tightly with plastic wrap and let rise for 45 minutes. Preheat the oven to 375 Fahrenheit. Butter an 8 1/2 x  4 1/2 inch loaf pan. Transfer dough to a lightly floured surface. The dough will feel sticky and wet but DO NOT add additional flour. Shape into a loaf. Place loaf in the pan, cover with poled plastic wrap and let rise for 30 minutes. Bake for 40 minutes. Let cool completely before slicing. 

*this flour does not require kneading.
*additional flour will make your loaf too dry

Enjoy! Let me know if you try this.


Sunday, August 30, 2015

Three Ingredient Flourless Cupcakes - From SCRATCH!


Would you believe me if I said that you can make rich, flavorful cupcakes without flour, sugar, or milk?

Three ingredient cupcakes


These amazing cupcakes are made with only chocolate chips, eggs, and full fat coconut milk. I got the original recipe here: https://youtu.be/-XG3RU9bCE8

I first tried the recipe just as instructed, except I used 5 1/2 ounces of chocolate chips rather than chocolate bars. It was good, but I like more. I do love my frosting and glazes! When I made this recipe again, I thought, since I need parchment paper anyway, why not just pour the batter into cupcake liners?

Three ingredient cupcakes


Three ingredient cupcakes


I also made them "grown up" style. With a bit of Kahlua Mocha. The Kahlua just takes the whole thing over the top!!

Three ingredient cupcakes

Three ingredient cupcakes

Three ingredient cupcakes


Seriously, these little beauties are simple enough to make to satisfy a quick dessert craving, while being delicious and elegant enough to impress your dinner guests. Plus, I think they're super adorable on a vintage floral saucer, don't you think?

Three ingredient cupcakes


Look at the inside. Scrumptious!

Three ingredient cupcakes

So, here it is -

Three Ingredient Chocolate Cupcakes 
  • 5.5 oz chocolate chips (I use dairy free, dark chocolate)
  • 3 eggs, separated
  • 1 can full fat coconut milk, or coconut cream
Cakes: Preheat oven to 325 degrees Fahrenheit. Refrigerate your **coconut milk while you make the cupcakes (or do like I do and store your coconut milk in the fridge!). Melt the chocolate in a double boiler and, once the chocolate is smooth, let it cool at room temperature. Separate your eggs and add the yolks to the melted chocolate. Whisk the chocolate and egg yolks together until smooth. Using a hand mixer, beat the egg whites until stiff peaks form. Fold the egg whites into the chocolate and egg mixture. Place 8 cupcake liners into a cupcake pan. Fill liners about a third full. This recipe should be evenly divided among the eight liners. Bake at 325 degrees for about 30 to 35 minutes, until the tops of the cupcakes begin to show cracks. Remove from oven and let cupcakes cool completely.
Topping:
Empty coconut milk into a mixing bowl, discarding (or save for re-use) the coconut water. Beat the coconut milk with a hand mixer until it resembles whipped cream. If you would like to sweeten the coconut milk, or keep the whip from falling apart, you can beat in a couple of tablespoons of powdered sugar. I like to do this if I am saving the whip for a later time. When ready to serve, add a generous dollop of coconut whip topping to the cupcake.
If you are making it adult style, remove the cupcake from the liner, put it on its plate or bowl and pour a bit of Kahlua over the top and let it run to the bottom of the dish. Now, add your cream.

**When shopping for coconut milk, pick up the can and shake it. If it is too solid to slosh inside the can, it will be perfect for whipped coconut cream. My favorite brand is Chaosuan. It is most consistent in the fat content and the ability to whip.


Tuesday, March 5, 2013

Vegan Cashew Cheese - YUM!


This is seriously amazing. I called it "nut cheese" to the family and I got all of those um, really? faces. Ha! :-/

Anyway, I sort of mixed two recipes (okay, three) to get what I got.

The recipe for the cheese I found on Pinterest, from Vegan Nom Noms. Her instructions say to let cheese ferment a few days. Ha! I am way too impatient for that. Maybe when the newness fabulousness wears off....

Raw Cashew Cheese

- 1 1/2 cups raw cashews (or cashew pieces)
- 1/3 cup water
- 2 teaspoons lemon juice (fresh squeezed is the best)
- 2 cloves garlic
- 1/2 teaspoons sea salt

Put the cashews in a bowl and cover with enough water to cover the nuts by about two inches. Let soak for 2+ hours and then drain.

Combine the soaked + drained cashews, water, lemon juice, garlic cloves and sea salt in a food processor and blend. Scrape down the sides and blend again until completely smooth, a couple minutes or more depending on how good your processor is.


Vegan ranch flavored cashew cheese


Then I added a tablespoon of ranch mix. I found this on Pinterest also, brought to us by The Crafty Blog Stalker. If you need want the full recipe for ranch dressing, go check her out.


Ingredients:
Black Pepper ¼ C
Parsley Flakes 1 1/2 C
Garlic Salt ½ C
Kosher Salt 2 T
Granulated Garlic ¼ C
Granulated Onion 3/4 C
Dill Weed 2 T


Vegan ranch flavored cashew cheese


I blended 1 tablespoon of the dry ranch mix with my cashew cheese and put it in the fridge to set. This recipe was already thick enough that there was no cheesecloth draining process required.

Vegan ranch flavored cashew cheese


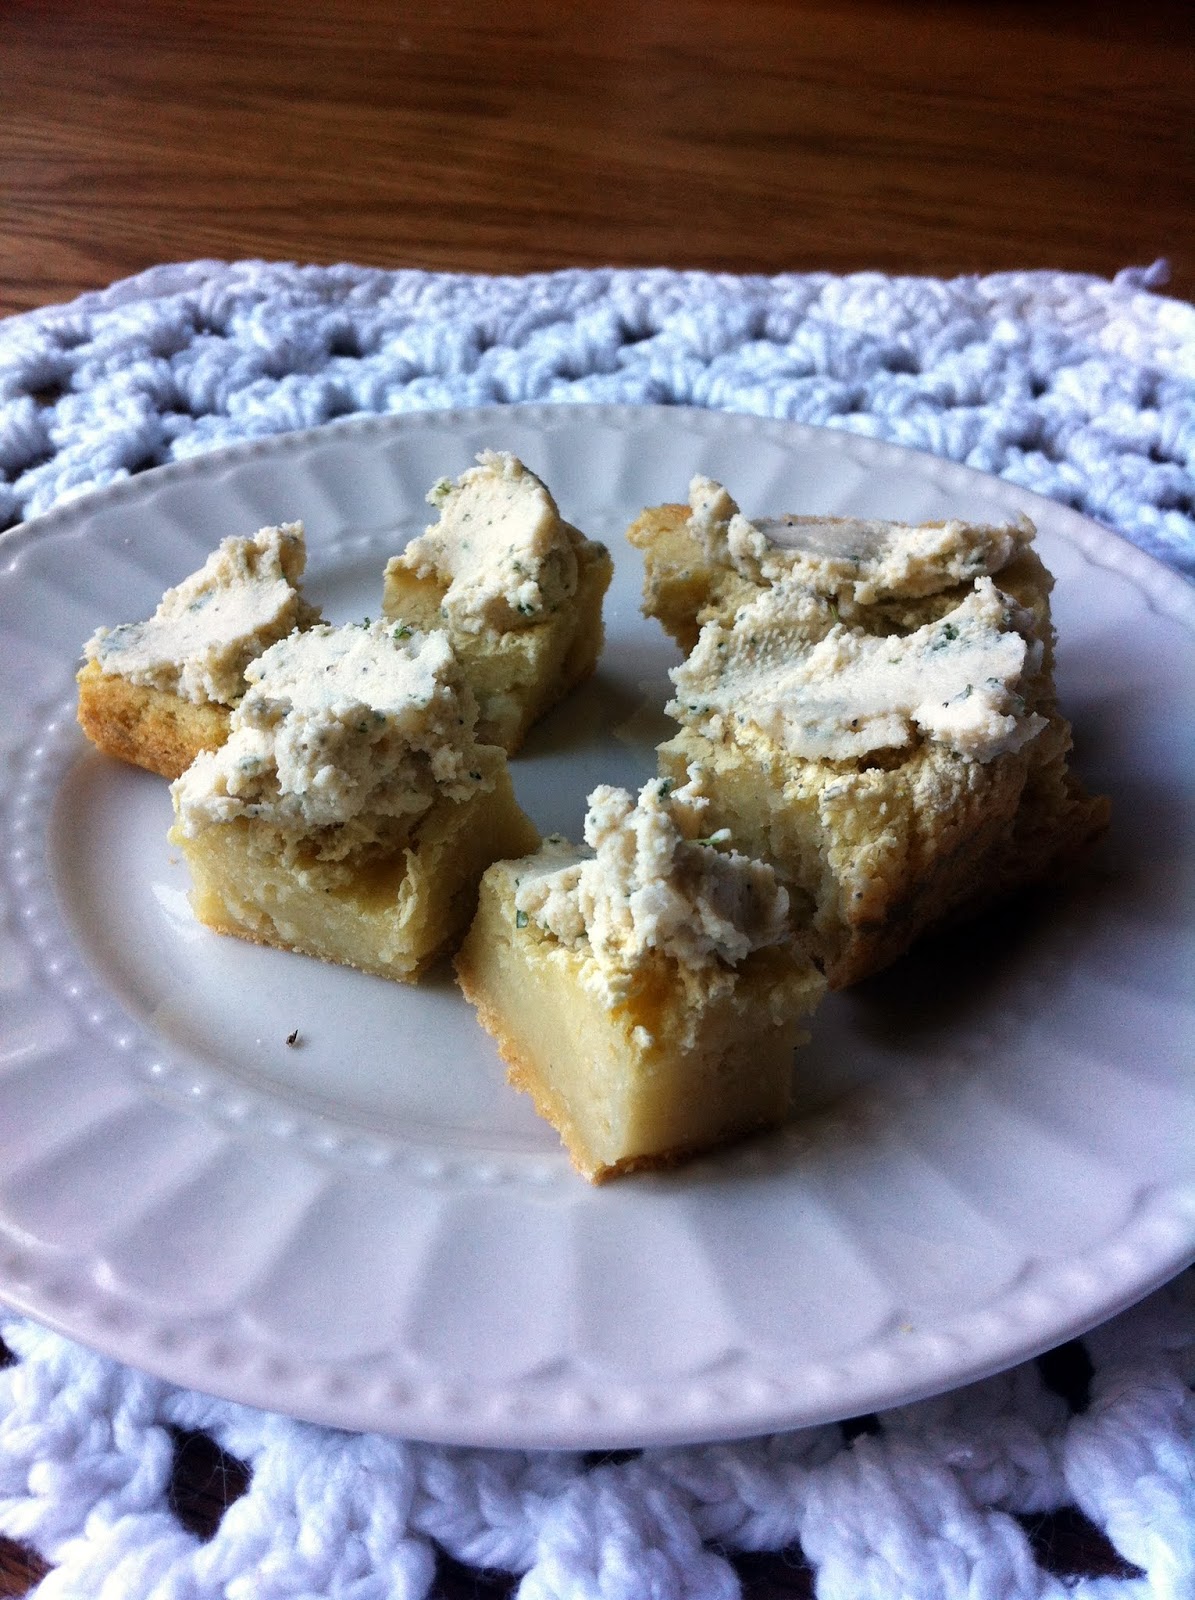
I did say there were three recipes mixed here. The third is for my gluten free bread. I did this one all wrong today and it turned out super flat. Oh, well, it's still a pretty good vehicle for this cashew cheese!

Vegan ranch flavored cashew cheese

Vegan ranch flavored cashew cheese

Okay, now I'm hungry. I'm so gonna run and finish off my nut cheese and yesterday's leftover lentil burger. Stay tuned, I will show you how to make those soon :)

Saturday, March 2, 2013

Lentil Tacos


Sometimes I have a hard time photographing food. Not 'cuz it's hard, no. Because I am usually hungry and I want to shove it all into my face. But, noooooo, I gotta prep, make sure I have the right lens on my camera, get the mirror so I have good light and all that. It's worth it to get good photos. And if I don't get good photos, then I am outta luck because I eat before I look at what I took.
Okay, let's get to the real story. Lentil tacos! I will just tell you how I do it because, let's face it, I don't "do" recipes well. Maybe it's a Gemini thing, maybe it's just a Christine thing. But, here goes:

  • Rinse and sort 1 cup lentils. Add to pot with 2 cups water. Bring to a boil then reduce heat to simmer and let 'em go for about 45 minutes.
  • After they are cooked, shake some cayenne pepper into the pot. Dump some taco seasoning and salt in too. However spicy or not spicy you like it, add seasonings appropriately.
  • Mush it together.
  • Add to a warm tortilla with some lettuce, avocado and whatever else you want. Like hot sauce? Add that too. I used La Victoria orange sauce. Yum!
  • If you use avocado, make sure you add a citrus too. Squeeze some lime or peel an orange for the side. Because Dr. Oz says that eating avocado and citrus together is a fat busting combo. I am all about busting my fat!

Lentil tacos
 It looks like ground beef in the photos, doesn't it?

Lentil tacos

But the lentils are so much cheaper. And they are heart healthy. Win-win!

Lentil tacos

It's a great and healthy way to stretch the food budget for non-vegetarians. Eat veg for breakfast and lunch and just have meat at dinner. Aaaand, do some all vegetarian days.

Lentil tacos

Heck, do some vegan meals too. This meal is vegan.

Lentil tacos

It's got it all.....whole grains in the corn tortillas, fiber and vitamins in the lentils, healthy fats and nom-nommy taste. Oh, and it's gluten free too!